Posts

Showing posts from August, 2022

Unity tutorial 07

Image
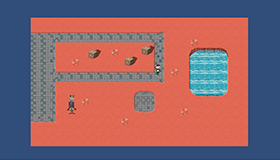
 Unity tutorial seven. This is my final week of Unity tutorial.Last week I began working on my project. After six tutorials I feel I am ready to work with unity to make a 2D game. Last week I focused on Visual Styling and User-interface. I learned how to  add UI to my p roject to show the current health of my main character. I created a canvas and added my Health meter to the UI. I edited the UI in the editor. I also learned how to create a new C# to make the health bar really work. Ruby's Adventure This week I am learning about audio, I have worked with audio a small bit last semester but I researched how to do it through youtube videos. Now learning it from Unity I got a better understanding of how to use audio. The fist new thing I learned was how to make a one shot sound. That is a sound that only plays once, when something is happening like coin collection or a character getting hurt. Lastly I built the game. I have already built a game for last semester so I did not h...
Unity Tutorial Six

Image
 Unity Tutorial Six  For  last week's Unity tutorial, I learnt how to have the camera follow the main character in the game. Previously, my game employed a static camera, which meant that it only operated within a single scene. I needed to first download the Cinemachine package from the Unity asset shop. Then I configured the asset. I made the camera follow my primary character. I used the Cinemachine Confiner to set some boundaries to prevent the camera from seeing anything outside of my game. I had also learned about visual styling and made a smoking effect. Ruby's Adventure This week I am focusing on Visual Styling and User-interface. I learned how to  add UI to my p roject to show the current health of my main character. First I created a canvas. Then I added my Health meter to the UI. I then edited the UI in the editor. Next, I changed the white rectangle to the image I needed by bringing the Sprite in Art > Sprites > UI called UIHealthFrame into the S...

Unity Tutorial Five

Image
 Unity Tutorial Five During last week's Unity tutorials I learned a lot of useful information and skills that I will use for my project like triggers and a health bar. First I created a new Controller and set it up on my Robot Animator. Then inside the animations folder, I made an animator controller, I then assigned my controller in the controller setting. I had an issue because  I forgot to put it on Prefab mode. In the animations window, I created an Animation Clip. I named it RobotLeft.anim. Ruby's Adventure This week I  learned how to have the camera follow the game's main character. Up until this week, my game used a static camera which means my game only worked within one single scene. First I had to download the cinemachine package from the unity asset store. Then I had to set up the asset. I had to make the camera follow my main character. To stop the camera from showing stuff outside of my game I used the Cinemachine Confiner to make some boundaries.  ...

Unity Tutorial Three

Image
 Unity Tutorial Three During last week's Unity tutorials, I learned how to decorate my game's world and how to add world interactions. I was optimistic about doing the tasks. added all sorts of decorations then added rigid body to the additions. Adding the boxes brought the game to life and I was pleased to see my game starting to look like a game. I also was introduced to prefabs for the first time. I had a few hiccups but I overcame them in a short amount of time. This week I am doing something exciting. I am learning about sprite animation. I will be adding animations to characters.  Ruby's Adventure This week started on a somewhat rocky note, my Unity was down. I did not know why but my projects would not load. I had to delete some of the projects I created in order for the Unity app to update. After the update, the project began working again. This week I created collectables by creating triggers. I first made a health stat, which had a lot of code involved. It was a t...

Unity Tutorial Four

Image
 Unity Tutorial Four During last week's Unity tutorials I learned how to decorate my game's world and how to add world interactions. I was optimistic about doing the tasks. added all sorts of decorations then added rigid body to the additions. Adding the boxes brought the game to life and I was pleased to see my game starting to look like a game. I also was introduced to prefabs for the first time. I had a few hiccups but I overcame them in a short amount of time. This week I am doing something really interesting. I am learning about sprite animation. I will be adding animations to characters.  Ruby's Adventure First I created a new Controller and set it up on my Robot Animator. Then inside the animations folder, I made an animator controller, after, I assigned my controller in the controller setting. I had an issue as I forgot to put it on Prefab mode. In the animations window, I created an Animation Clip. I named it RobotLeft.anim. I created my animation with difficulty a...

Unity Tutorial Two

Image
 Unity Tutorial Two Last week I got my introduction to 2D game development after spending the last semester working with 3D. For this semester I am to create a 2D game for my class project and will use these tutorials to help me as I go along. The first thing I have done before this week's tutorial is creating the game file downloaded the assets and create a player with C# code . This week is all about decorating the world of my game and world interactions. I was excited to do this week's tutorial task as I feel these steps will make me really see the game come together. First I had to add decorations. I had to add a collision so the main character does not go through the decorations I set out. I then learned what a prefab was. A prefab makes a GameObject with all the components and settings into your assets. I soon had to create a prefab.  Ruby's Adventure I enjoyed this week's tutorial but had some issues with making the world interactions. When adding the rigid body...

Unity Tutorial One

Image
 Unity Tutorial One This is my first week working with unity to create a 2D game. The tutorial I'm working on is Ruby's Adventure 2D game. I will be following along with the unity website to bring the game to life. First I had to import my assets into the project. Then I had to use a sprite for the first time to create a Game Object. Then I set the main character some horizontal and vertical  coordinates. Once i completed all that I created a script call Ruby controller. I was glad I already had experience doing so. I then added some Keyboard input to my game  so now she can move aswell.  Ruby's Adventure   Begining the tutorial came with a little bit of difficulty. I am so used to 3D  games because of last semesters tutorials and project. Although a little overwhelmed by the layout I over came my struggles with the software. After following the tutorial I realised I prefer working in 2D more, I think it is due to not having to worry about dimensions and ha...

Project Progress

Image
 Project Progress, Alpha & Beta Recap of last week, during my last project task I created my first playable. I added sound effects to my game, made a background that moves and added a main character. It was tough figuring all that out by myself but I managed to not let any issues I had last week bleed into this week's work. The aim this week was to make the main menu page with working buttons and fruit for the main character to catch. My game background The first thing I wanted to start on was the main menu. I have already previously made the main menu for my 3D game "MarzRun". The first thing first was to import an image to my assets folder. I used an image of the forest I have as the game background. To make it look more elevated, I took the image and put it into adobe illustrator. I added the title for my game and some stars and a moon. Next, I created a canvas and added my image. Then I added text mesh for the PLAY and PAUSE buttons. I designed the buttons to look...

Project Progress

  Project Progress, Presenting your game.  I have finally completed my game Fae Catcher. It is great to see my 2D game come to life I have finally uploaded my 2d game to Itch.io, a platform for games. It has been a real struggle figuring out how to create a smooth-running 2D game. I feel the hardest part was uploading it, I had to install Web.Gl and that took a lot of time and slowed down my laptop but in the end, I am glad to have a game made.  Fae Catcher is a simple adventure game about Blue, a fairy hunter going into the forest to collect faes. The aim of the game is to catch as many games as possible.  The link for my uploaded game is here: https://samimi.itch.io/fae-catcher

Project progress

 Project Progress, First Playable For last week's project task, I made the first Prototype for my game. I was able to make my main character move from left to right. This week I  aimed to add background music and forest sounds to my game. Then add a background and actual character.  first I Finally decided on a background. I chose a nighttime forest that is pixilated. It may be a different colour scheme than I want but I feel it is a sacrifice that was worth making. It is blue and green but It is really cute. I wanted to complete the forest mood so I went to add the sound early on. so the next thing to do was convert the royalty-free music and forest sound effects into a youtube converter. Then I downloaded them and put them in my assets folder.  After adding them to the game I am really happy with the way it turned out.  I was able to make a decision on my main character too. I found a starter 2D game pack that came with all sorts of assets. It had a set of fou...

Project Progress

Image
 Project Progress, Prototype This week I finally began creating my game on unity. I first looked over the tutorials I linked to my first project post, but they did not really help me. I was finding it fairly difficult to use videos made over three years ago. Like I have said last semester, Unity updates itself every year and the code you may have used last year may not be compatible this year. This makes Youtubers like Brackey only partially helpful. I did however find a good youtube video to get me started. I first wanted to be able to make my player move forward so I used this tutorial  I found for help.  I knew had some issues with the code when I was not able to play my prototype. I figured out that my issue was with the curved parentheses, I had not closed a set in my C# script file. Soon enough I fixed that issue and was able to move my player forward.  I downloaded some assets to try out for my game and have not really come to a decision on what background I w...

Project Progress

Image
 Project progress, GDD PowerPoint This week I have completed my game design document. I have chosen to write it up on Microsoft PowerPoint. That was the best medium for me to complete my game design document. After last week's Project task I found it a whole lot easier to write it up. I find it beneficial to see all my work condensed like that. It will be useful to come back to when I am working on my 2D game in unity. A recap of what my game is, The name of my 2D game is "forest forager" is an adventure game set in a forest. The main character who is a villager goes into the forest to collect fruit. The fruits are counted up and the aim is to get as many fruits as possible. The game has a pixilated retro style. I am to make it look like it is a game you could play on an old Nintendo.  The vibe of the game is really captured through the music and sound effects in the game. I have decided on which sounds I am going to use for my 2D game. The sound of a windy forest and cal...

Project Progress

Image
  Project Progress,  For last week's project task, I was to brainstorm up some ideas for my 2D game. I landed on three solid ideas. The first was a candy crush saga-inspired game, where I match up pieces. The focus of that game was sound. The second idea was a car game with the aim to avoid traffic. My last idea was to create a coin-collecting game. I have finally come to the decision that the third game is going to be the game I create.  Firstly, I want it to be autumn colours, brown, orange, and maroon. I like forests during that season so I feel it best to be set in that time. Next, I feel a pixelated game would suit. I will have to look through the Unity Asset Store to find what I need for the development of this game.  I would like it to be set in a forest with leaves rustling and soft melodic music playing. I looked at some youtube videos for some inspiration. I found some good videos with sounds I would like to incorporate into my game. There is this one flute...

Project Progress

Image
 Project Progress, Brainstorming This is the first of my 2D game project. I am beginning by brainstorming some ideas for my 2D game. I hope after spending the first semester creating a game, it will come easier for me this time around. I know now not to aim for something way out of my expertise. Here are some ideas I have for my 2D game. Candy Crush Saga My first idea was a Candy Crush type of game. Knowing my game has to be in 2D makes it easier for me to create a simpler game. I have always liked brain teaser games, so a Candy Crush game would be enjoyable to create. The rules of the game would be to match three pieces of a game together and collect points to move p a level. I think what would make this game great would be the sound effects. I always found the sound after matching the candy together satisfying about the game. Here is a link to the tutorial.  https://www.youtube.com/watch?v=96qNxHgRIUo&list=PLw919wW8ikxe_e_VgvPgL7_KA76501StQ&index=9 My second idea for...

Reading 12: Doing

Image
  Reading 12 I have now finally finished my chapter completely. After all this time researching and filtering out content I can now say I produced a chapter I am happy to show. I have learned a lot from my project and will use the knowledge learned in my future projects.  I have also learned so much from my classmates and it was great to help them too. Reading their work made me truly interested in their given topics. Nature game I now know so much about game aesthetics and find the topic way more interesting now that I have researched all about the topic. I was not always into gaming, in fact, I was edging toward disliking games but now I have gained a new appreciation. The work going on behind making a game an immersive experience is now very interesting to me. I find it admirable the dedication had when creating a world and story in a game and will look out for them in the next games I find myself playing.  I am also happy with the paragraph-making skills I have built ...

Reading 11

Image
  Reading 11 the time has come for me to add my chapter of our class document with my peer's work. I have read over my work again and factored in my classmate's feedback and work. I want to be confident in my piece, so it is important to go over my chapter and really try to make it as good as possible. I feel I have a clear topic and have the information I need to make the reader understand. throughout this process, I felt like my conclusion would be my biggest struggle and I was right. Finding a way to summarise my topic in a quick and convincing way was difficult but in the end, I have completed my conclusion and am proud of it.  Book I aimed to make my chapter as informative as possible without it being too confusing. I stuck to my core topic and tried not to confuse the reader. Clear and concise was the goal and with the help of feedback, I feel I have reached that. I am excited for the class book to be released and can not wait to read all of our work. 

Reading 10

Image
 Reading 10  This week is dedicated to graphics and images. After completing my chapter and receiving my feedback I am in need of some graphics. I am focusing on the aesthetics of the game so a visual ad to my chapter is more than necessary. I have looked for some free images to use and made some mock-up drawings of what I would like in my chapter.  First, I would like to demonstrate how the mood of a game can be changed by colour. I think I will do this by finding an image and changing the filter making it appear more bright or more dark and gloomy. My images should be examples of the points I make in my chapter. I also want to add images that display high resolution visuals and aesthetically preasing visuals showing the reader the difference between the two. I might add an image of a game that is a good example of a nice aesthetic. I was thinking Life is Strange or Badlands Badlands Next, I had to create an author bio about myself. Samira jailani, Mimi for short, is a 2...

Reading 09

Image
 Reading 09 This week, I am assigned to look over and review the chapters of my peers and then begin working on my own chapters based on the criticism I have gotten from my classmates. I have written my chapters through much trial and error. I have made my introduction and conclusion for my chapter and I have added the bibliography I have been working on since the beginning of this task. I am glad to of had feedback from my peers and to of given feedback myself. I feel with every criticism I receive I am given the tools to improve my chapter of the book.  forest My chapter is about game aesthetics and their importance to storytelling and graphics.  The game aesthetic is the style of the game. Through shapes, sound and colour palate a game developer can make the player feel what they want to feel and react to what they want. Through the use of sinuous shapes a game can feel natural rustic and archaic, while sleek three-dimensional shapes can feel futuristic and mechanical....

Reading 08

Image
 Reading 08 For this week's reading, I have to watch three videos on how to write an introduction and how to write a conclusion well. Next I am to write both for my chosen topic. in the first video starts out by saying your essay should open with a bang. It should grab attention and give the reader context, It should not open with a summary. it should show what the essay is about not tell what the essay is about. A good way to start your essay like this is to connect the topic to a larger event. It should be fun, write an anecdote, make a pop culture reference or song lyric. as long as it is relevant this should make your introduction more immersive and that is the goal. Conclusion The second video talks about how conclusions are key. The conclusion is the last chance to get the reader to understand and agree with you.  A conclusion is a good place for a solution. Make sure not to start a new topic. people will understand things are personalised to them. Make sure you are pass...

Reading 07

Image
 Reading 07  For this week's reading task I am required to write at least five to six paragraphs about my selected topic, mine being game aesthetics. Each paragraph must have at least 5 sentences, including an introduction, conclusion, and at least one supporting phrase. Each student in the class is assigned to read and remark on two additional works made by peers. We must carefully examine them to ensure that they include everything specified above, and if not, we must indicate what is missing and what is not so that we may assist them in making adjustments and making it appear better.  review Since I am in the same chapter as them I have read over the work of Mary and Hanin. It was nice to see the work they both put into their pieces. Their paragraphs were easy to read and were not too long their topics were clear and concise. I also felt like I was learning from their research. I could not find any faults with their work, if anything, it took inspiration from their wor...

Reading 06

Image
 Reading 06 As usual, this week starts with two tasks. The first is a video I should watch that will aid me in my overall reading project in creating a game. second is writing about it here. Beginning with the former I had to watch a video on how to make a good paragraph.   i n order to make an academic paragraph you need to indent a line or skip a line never do both. Have one central idea in a single paragraph, don't fill your paragraph with different ideas. But be sure to make the topic clear in the paragraph. All other ideas must relate directly to the topic everything should support each other. a paragraph can be as long as you want but 5 sentences should be enough. make sure everything is important and show reasons why. Examples are the best way to show your points. Next, the video talked about bridges, Bridges connect sentences and create flow through your paragraphs. I Learned to avoid repetition of words, especially in the same paragraph.  Paragraph I used th...

Reading 05

Image
 Reading 05 This week I want to focus more on starting my book chapter. I have fully re-read the articles I have found and linked to my previous blog posts. First I had to watch the video for this week's reading test as well.  This week I learned how to code a document and create themes. I remember Harvard referencing from last year so I am sure that will come in handy for the bibliography of the class book I have already collected ten articles and videos I can source. The task for the research was to watch the video. Code each of my annotated bibliographies and there should be at least five themes. then I have to find the gaps in my research and I will need to write five sentences about each theme.  Harverd Referencing This was a really helpful task and now I know that I am missing a few topics from my research. Trying to figure out how to code a document was tedious in the beginning but I can see why it is a necessary step. In seeing what I have in such an organised man...

Analysis

Image
 Analysis This week I spent more time researching my topic of Game Aesthetics and watched a video on how to read a scholarly journal. Before watching I knew that it would be useful to me as I have had struggles picking up the most important piece of a document in a quick amount of time.  The video talks about how it is not necessary to read every word of the document in the first read. In the video, the guy says it is best to read the abstract of the article first, the abstract is a summary. Then you can decide if it is relevant to your research. Next, you skim the introduction looking for keywords. Highlighting some key sections give you future quotes you can use. Next skip all the way to the conclusion. It will tell us what the writer has found in their studies. after all, go back to what it's highlighted and deeply read around those paragraphs. I applied my newfound knowledge to some articles I read for my research about my chapter on Game Aesthetics. In the first article, ...

Doing

Image
 Doing Using last week's research I will be reading through the articles I have collected for my chapter about game aesthetics. After reading and watching all my gathered I have found the path I want to lead my chapter.  One of the videos I found talked about the difference between game aesthetics and graphics. To put it short, game graphics are just the technical enduring of vectors. Better graphics equal more detail but that doesn't make the game good. The aesthetic is the style and is what makes a game look visually appealing. I want to focus on how important game aesthetics are to the game's graphics and story. One of the articles it talks about how lines and shapes can change the mood of a game e.g. circle shapes feel more innocent and youthful while triangles feel aggressive and forceful.  shapes in conclusion, I want to have my chapter talk about game aesthetics being the key to enhancing the story  and graphics of a game.

Planning

Image
 Planning This semester, we will all write a chapter of the collaborative book our year group will be making. After looking at the spreadsheet. I want to be focusing on the game design chapter. I want to focus on game aesthetics as a sub-topic. Although I feel this topic also goes into game immersion I will focus on it through the game design lens. I will research it through articles and Youtube videos. My plan is to use keywords to gather a handful of articles that can be my starting point, a foundation. Then I will research the information deeper through a few more articles. Starting with this week I will find my foundation articles and youtube videos.  game aesthetics I found a great video on aesthetics vs graphics on Youtube. It talks about how high-resolution graphics don't work unless you create a greater aesthetic.  https://www.youtube.com/watch?v=5oK8UTRgvJU I also found an article about te aesthetics of game art tat discusses the psychology of shapes, lines and v...

Game Upload!

Image
 Game Upload I have completed and uploaded my game, MarZ Race to Itch.io. link to my game

Project Week 11: Beta

Image
 Beta This Week was by far the toughest. Now that my game is complete i need to make a menu screen. This was the hardest for me to achieve because most tutorials are for an older version of unity. Luckily I found a five minute tutorial on how to make my menu screen, my bigest issues was the C# script. I had to add a script stement that i forgot to add. after that was my issue with messing up a file in my inspector. After all that was complete i had a fully functional game with a working home screen. to add a little extra i had searched for some music in the background and found a cyberpunk gaming soundtrack that was royalty free. I found a tutorial to follow and now my game has sound aswell. My Menu

Project week 9: Alpha

Image
Alpha I have further worked on my game this week. I fixed my issue with my obstacles by adding a mesh collider to the obstacles and a box collider to my floor panel. this week I wanted to focus on having the camera follow the camera and have my vehicle move left and right. I used Brakeys youtube videos to help me with the controls and looked at some past unity tutorial. I had a big issue making the camera follow my camera but in the end, I found the issue, there was an error in my code. after fixing those errors my game is playable with no issues.

Project Week 8: Project Playable

Image
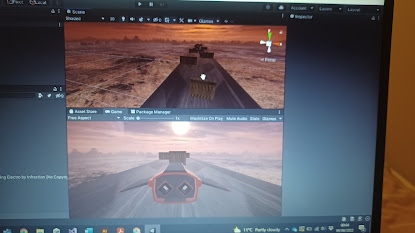
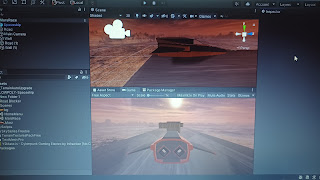
 Project Playable.  This Week I made real progress with my game. I started out with the Atmosphere I went to the asset store and downloaded some backgrounds and ships. I finally went with what is in my picture below, I have made my spaceship move forward with no lagging, I gave it some mass through a rigid body.  I have created a long-lasting road and gave it some texture through a skin I found in the asset store. My laptop is having issues screenshotting so I took photos of my progress through my phone. I have come to face one issue, The weight of my obstacles makes them collapse through thee floor  First Playable

Project week 6: GDD

Image
 Game Design Document  I have created my GDD this week, after looking at all my options I have decided to create it on Powerpoint. I think it is the most efficient way to make my GDD. After this process, I can see a clear view of my game. All the work I have been doing has been put into one single and cleaned-up space. GGD