Unity Tutorial Six
Unity Tutorial Six
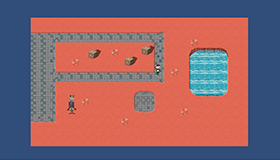
For last week's Unity tutorial, I learnt how to have the camera follow the main character in the game. Previously, my game employed a static camera, which meant that it only operated within a single scene. I needed to first download the Cinemachine package from the Unity asset shop. Then I configured the asset. I made the camera follow my primary character. I used the Cinemachine Confiner to set some boundaries to prevent the camera from seeing anything outside of my game. I had also learned about visual styling and made a smoking effect.Ruby's Adventure
This week I am focusing on Visual Styling and User-interface. I learned how to add UI to my project to show the current health of my main character. First I created a canvas. Then I added my Health meter to the UI. I then edited the UI in the editor. Next, I changed the white rectangle to the image I needed by bringing the Sprite in Art > Sprites > UI called UIHealthFrame into the Source Image setting of our Health GameObject, the child of our Canvas. I needed to create a new C# to make the health bar really work.
I spent a lot of time in this tutorial and learned a lot. I hope to implement what I have learned in my own 2d game.

Comments
Post a Comment