Posts

Unity tutorial 07

Image
 Unity tutorial seven. This is my final week of Unity tutorial.Last week I began working on my project. After six tutorials I feel I am ready to work with unity to make a 2D game. Last week I focused on Visual Styling and User-interface. I learned how to  add UI to my p roject to show the current health of my main character. I created a canvas and added my Health meter to the UI. I edited the UI in the editor. I also learned how to create a new C# to make the health bar really work. Ruby's Adventure This week I am learning about audio, I have worked with audio a small bit last semester but I researched how to do it through youtube videos. Now learning it from Unity I got a better understanding of how to use audio. The fist new thing I learned was how to make a one shot sound. That is a sound that only plays once, when something is happening like coin collection or a character getting hurt. Lastly I built the game. I have already built a game for last semester so I did not h...
Unity Tutorial Six

Image
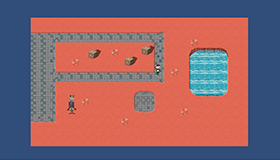
 Unity Tutorial Six  For  last week's Unity tutorial, I learnt how to have the camera follow the main character in the game. Previously, my game employed a static camera, which meant that it only operated within a single scene. I needed to first download the Cinemachine package from the Unity asset shop. Then I configured the asset. I made the camera follow my primary character. I used the Cinemachine Confiner to set some boundaries to prevent the camera from seeing anything outside of my game. I had also learned about visual styling and made a smoking effect. Ruby's Adventure This week I am focusing on Visual Styling and User-interface. I learned how to  add UI to my p roject to show the current health of my main character. First I created a canvas. Then I added my Health meter to the UI. I then edited the UI in the editor. Next, I changed the white rectangle to the image I needed by bringing the Sprite in Art > Sprites > UI called UIHealthFrame into the S...

Unity Tutorial Five

Image
 Unity Tutorial Five During last week's Unity tutorials I learned a lot of useful information and skills that I will use for my project like triggers and a health bar. First I created a new Controller and set it up on my Robot Animator. Then inside the animations folder, I made an animator controller, I then assigned my controller in the controller setting. I had an issue because  I forgot to put it on Prefab mode. In the animations window, I created an Animation Clip. I named it RobotLeft.anim. Ruby's Adventure This week I  learned how to have the camera follow the game's main character. Up until this week, my game used a static camera which means my game only worked within one single scene. First I had to download the cinemachine package from the unity asset store. Then I had to set up the asset. I had to make the camera follow my main character. To stop the camera from showing stuff outside of my game I used the Cinemachine Confiner to make some boundaries.  ...

Unity Tutorial Three

Image
 Unity Tutorial Three During last week's Unity tutorials, I learned how to decorate my game's world and how to add world interactions. I was optimistic about doing the tasks. added all sorts of decorations then added rigid body to the additions. Adding the boxes brought the game to life and I was pleased to see my game starting to look like a game. I also was introduced to prefabs for the first time. I had a few hiccups but I overcame them in a short amount of time. This week I am doing something exciting. I am learning about sprite animation. I will be adding animations to characters.  Ruby's Adventure This week started on a somewhat rocky note, my Unity was down. I did not know why but my projects would not load. I had to delete some of the projects I created in order for the Unity app to update. After the update, the project began working again. This week I created collectables by creating triggers. I first made a health stat, which had a lot of code involved. It was a t...

Unity Tutorial Four

Image
 Unity Tutorial Four During last week's Unity tutorials I learned how to decorate my game's world and how to add world interactions. I was optimistic about doing the tasks. added all sorts of decorations then added rigid body to the additions. Adding the boxes brought the game to life and I was pleased to see my game starting to look like a game. I also was introduced to prefabs for the first time. I had a few hiccups but I overcame them in a short amount of time. This week I am doing something really interesting. I am learning about sprite animation. I will be adding animations to characters.  Ruby's Adventure First I created a new Controller and set it up on my Robot Animator. Then inside the animations folder, I made an animator controller, after, I assigned my controller in the controller setting. I had an issue as I forgot to put it on Prefab mode. In the animations window, I created an Animation Clip. I named it RobotLeft.anim. I created my animation with difficulty a...

Unity Tutorial Two

Image
 Unity Tutorial Two Last week I got my introduction to 2D game development after spending the last semester working with 3D. For this semester I am to create a 2D game for my class project and will use these tutorials to help me as I go along. The first thing I have done before this week's tutorial is creating the game file downloaded the assets and create a player with C# code . This week is all about decorating the world of my game and world interactions. I was excited to do this week's tutorial task as I feel these steps will make me really see the game come together. First I had to add decorations. I had to add a collision so the main character does not go through the decorations I set out. I then learned what a prefab was. A prefab makes a GameObject with all the components and settings into your assets. I soon had to create a prefab.  Ruby's Adventure I enjoyed this week's tutorial but had some issues with making the world interactions. When adding the rigid body...

Unity Tutorial One

Image
 Unity Tutorial One This is my first week working with unity to create a 2D game. The tutorial I'm working on is Ruby's Adventure 2D game. I will be following along with the unity website to bring the game to life. First I had to import my assets into the project. Then I had to use a sprite for the first time to create a Game Object. Then I set the main character some horizontal and vertical  coordinates. Once i completed all that I created a script call Ruby controller. I was glad I already had experience doing so. I then added some Keyboard input to my game  so now she can move aswell.  Ruby's Adventure   Begining the tutorial came with a little bit of difficulty. I am so used to 3D  games because of last semesters tutorials and project. Although a little overwhelmed by the layout I over came my struggles with the software. After following the tutorial I realised I prefer working in 2D more, I think it is due to not having to worry about dimensions and ha...

Project Progress

Image
 Project Progress, Alpha & Beta Recap of last week, during my last project task I created my first playable. I added sound effects to my game, made a background that moves and added a main character. It was tough figuring all that out by myself but I managed to not let any issues I had last week bleed into this week's work. The aim this week was to make the main menu page with working buttons and fruit for the main character to catch. My game background The first thing I wanted to start on was the main menu. I have already previously made the main menu for my 3D game "MarzRun". The first thing first was to import an image to my assets folder. I used an image of the forest I have as the game background. To make it look more elevated, I took the image and put it into adobe illustrator. I added the title for my game and some stars and a moon. Next, I created a canvas and added my image. Then I added text mesh for the PLAY and PAUSE buttons. I designed the buttons to look...

Project Progress

  Project Progress, Presenting your game.  I have finally completed my game Fae Catcher. It is great to see my 2D game come to life I have finally uploaded my 2d game to Itch.io, a platform for games. It has been a real struggle figuring out how to create a smooth-running 2D game. I feel the hardest part was uploading it, I had to install Web.Gl and that took a lot of time and slowed down my laptop but in the end, I am glad to have a game made.  Fae Catcher is a simple adventure game about Blue, a fairy hunter going into the forest to collect faes. The aim of the game is to catch as many games as possible.  The link for my uploaded game is here: https://samimi.itch.io/fae-catcher